Are you ready to embark on an exciting adventure of building your very own electronic car? Look no further! Troniction presents an extensive guide that will equip you with all the essential knowledge to construct an Arduino-based simple car. Let your imagination take the wheel as you dive into our comprehensive 6-step guide, tailored to help you bring your car-building dreams to life. Don't wait any longer – let's begin this thrilling journey together!
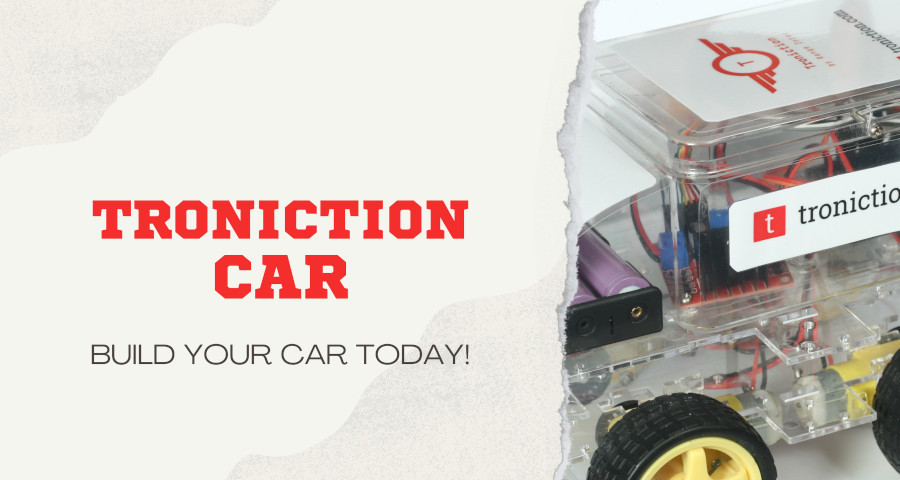
Discover the 6 Exciting Steps to Building Your Own Electronic Car!
Get - Acquire the Essential Components
Wire - Skillfully Connect the Components
Write - Craft the Perfect Code
Upload - Seamlessly Transfer the Code
Control - Take Charge and Drive Your Car
Share - Showcase Your Creation to the World!
Need More Information? Contact Us Today!
While our website provides comprehensive resources and information, we understand that you may have additional questions. Rest assured, we're here to assist you every step of the way. To get in touch, simply visit our contact page on the website or join our vibrant Facebook group. We eagerly await the opportunity to address any further inquiries you may have. Reach out to us today and let's connect !
Step 1: Gather All the Components for Your Arduino Car
The initial phase of constructing your car involves acquiring the essential components. Before making any purchases, we advise you to familiarize yourself with the building steps and gain a comprehensive understanding of the Arduino car assembly process.
To ensure a smooth building experience, it is crucial to have all the required components on hand. Troniction has conveniently compiled a comprehensive list of these components for your convenience. Please visit the link provided below for easy access:
To simplify the purchasing process, we have included affiliate links to popular online marketplaces such as Amazon, Banggood, and AliExpress. By using these links for your purchases, you can support us as we earn a small commission for qualifying orders.
Step 2: Connect Components Using Wires for Seamless Integration
After obtaining all the necessary components, the subsequent step involves interconnecting them using wires. Our comprehensive guide provides detailed visual instructions on how to establish these connections. The process begins by linking the motor drivers to the motors, followed by connecting the motor driver to the Arduino Uno R3 board. Each connection is meticulously explained, ensuring a hassle-free assembly experience.
For optimal results, we strongly recommend following the depicted wiring configurations precisely as demonstrated in our images and illustrations. By adhering to these guidelines, you can build your car with confidence. Once you have successfully completed your first car, you can explore alternative connection methods based on your preferences and expertise.
Car Control Code
Programming the Arduino Car
Step 3: Mastering Arduino Car Programming
Embarking on the software development phase may pose a significant challenge for novice car builders. However, fear not! Troniction is here to guide you through this crucial step with elegance and ease.
To ensure a smooth start, we offer fully functional and complete files specifically designed for your first car. These files can be effortlessly downloaded and uploaded directly to your car-board without any modifications required. Experience the joy of seeing your car come to life in no time!
In addition, we provide comprehensive explanations for each line of code, unraveling the mysteries of car programming. Immerse yourself in the intricacies of code execution as we elucidate its inner workings, enabling you to gain a deeper understanding of this fascinating field.
Furthermore, we proudly present you with the exact code employed in our renowned Troniction car. Witness firsthand the power of our tried-and-tested code, meticulously refined to perfection.
We highly recommend visiting our website to download the code and initiate the upload process for your car. Once your first car is up and running, delve into our detailed explanations of the car control code. As you grow in expertise, feel free to modify the code and take full control of your car, embracing the endless possibilities that lie ahead. Let your programming journey begin!
Step 4: Upload the Sketch - Bring Your Car Code to Life!
Once you have meticulously crafted your car code, the next crucial step is to upload it to the Arduino car-board, infusing it with life and functionality. To achieve this, simply connect your laptop to the Arduino using a USB cable, establishing a direct communication channel. With anticipation mounting, press the 'Upload' button, initiating the seamless transfer of your meticulously crafted car control code.
At Troniction, we understand the importance of providing clear and concise instructions to ensure a successful upload process. Our comprehensive guide offers step-by-step instructions accompanied by informative screenshots, making the process effortless and rewarding. To further simplify the uploading procedure, we recommend utilizing the user-friendly 'Arduino Create' platform, ensuring a hassle-free experience.
Step 5: Control Your Car with a Smartphone - Embrace the Power of Customization!
Congratulations on reaching the final step of this comprehensive guide! Now, it's time to unleash the full potential of your custom-built Arduino car. Troniction's Arduino car is equipped with rechargeable batteries and leverages Bluetooth technology to receive instructions, granting you complete control from the convenience of your smartphone.
To seamlessly control your car, you'll need to download a dedicated app to your smartphone. Our guide provides detailed instructions on how to locate and download the app, ensuring a smooth transition into the world of wireless control. With a simple tap of your finger, you can steer your car in any direction, exploring endless possibilities and embracing the excitement of customization.
By empowering you to take control of your Arduino car using your smartphone, we inspire creativity and encourage experimentation. Let your imagination soar as you unleash the full potential of your custom-built creation. We are thrilled to be part of your journey as you venture into the realm of personalized car control.
How to Control the Car Remotely
Step 6: Share - Showcase Your Creation to the World!
Congratulations on successfully building your own electronic car! The final step in this exhilarating journey is to share your creation with the world. At Troniction, we believe in celebrating and showcasing the remarkable achievements of our community members. Here's why Step 6 is an essential part of your car-building experience:
Inspiration for Others: By sharing your creation, you become a source of inspiration for fellow car enthusiasts and aspiring builders. Your innovative ideas, unique modifications, and personal touches can ignite the creative spark in others, encouraging them to embark on their own car-building endeavors.
Community Engagement: Sharing your car with the world opens doors to vibrant communities of like-minded individuals who share a passion for electronics and DIY projects. By participating in forums, social media groups, or local meetups, you can connect with fellow car builders, exchange ideas, and learn from their experiences, fostering a sense of camaraderie and collaboration.
Valuable Feedback: Showcasing your creation provides an opportunity to receive constructive feedback from experienced builders and enthusiasts. Their insights and suggestions can help you further enhance your car's performance, aesthetics, or functionality, taking your skills to the next level.
Recognition and Appreciation: Sharing your work allows you to gain recognition and appreciation for your efforts. Celebrate your achievements and receive praise from fellow enthusiasts who admire the dedication, ingenuity, and craftsmanship that went into building your electronic car.
Leaving a Legacy: By sharing your car, you leave a lasting legacy in the DIY and electronics community. Your creation becomes a testament to your passion, skills, and determination, inspiring future generations of car builders to explore their own creativity and innovation.
So, don't hesitate to document and share your car-building journey through videos, photos, blog posts, or social media updates. Embrace the opportunity to inspire, engage, and connect with a wider audience. Your electronic car creation holds the power to captivate, educate, and motivate others to embark on their own thrilling DIY adventures.