You may find information about the components required to build an Arduino car from the following link.
Troniction Arduino Car Components
Refer to the following diagram to wire the components.
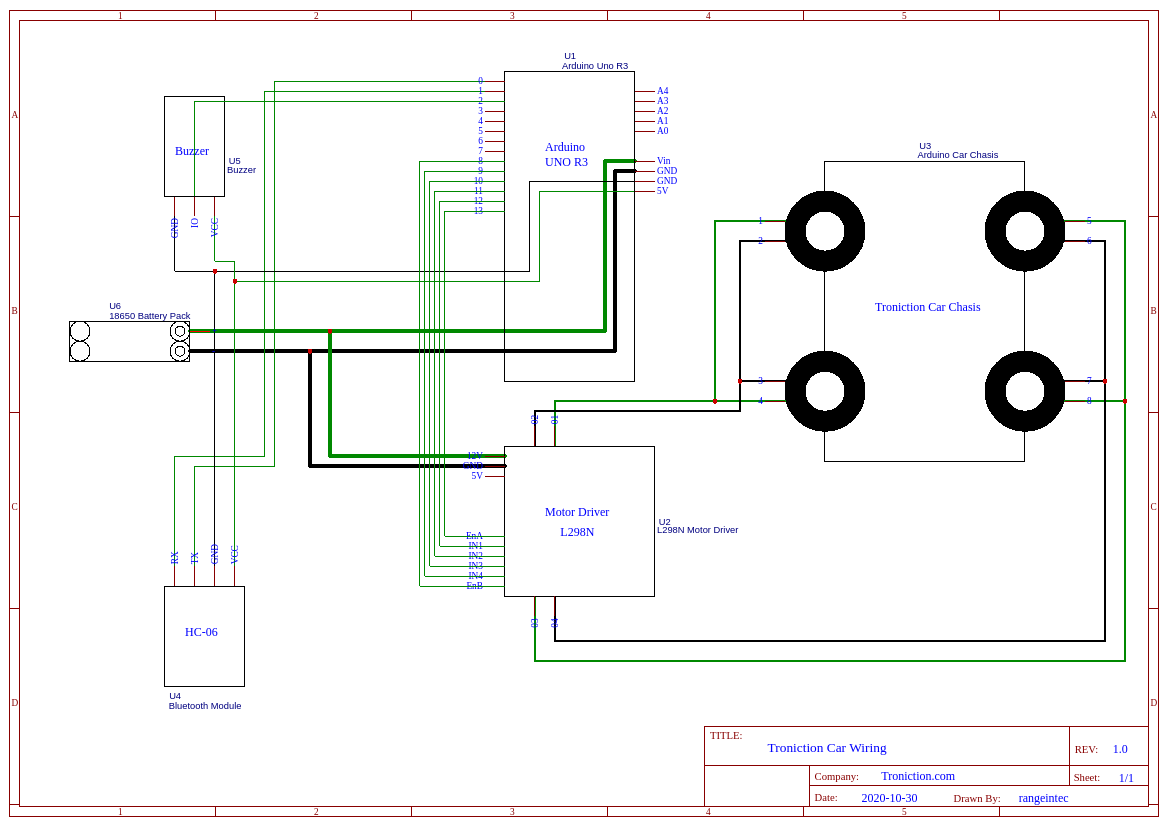
Step By Step Walkthrough - Wiring the Troniction Arduino Car
- Connect Motor Driver L298N to Gear Motors L298N to Gear Motors
- Connect Motor Driver L298N to Arduino L298N to Arduino
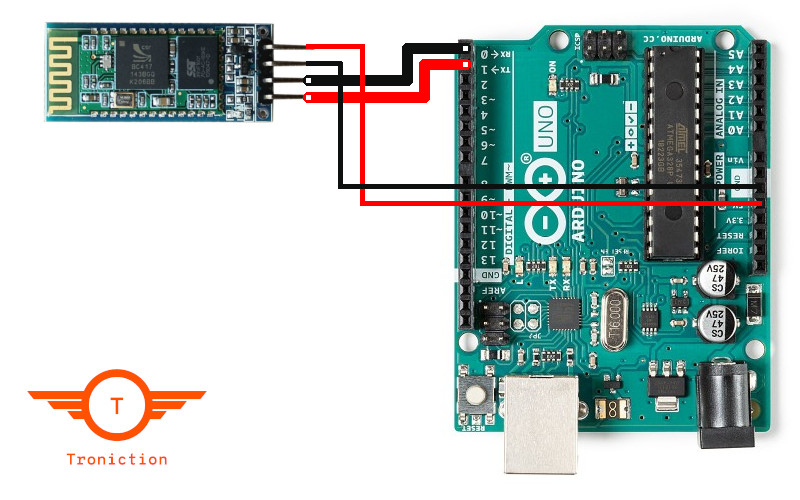
- Connect Bluetooth Module HC-06 to Arduino HC-06 to Arduino
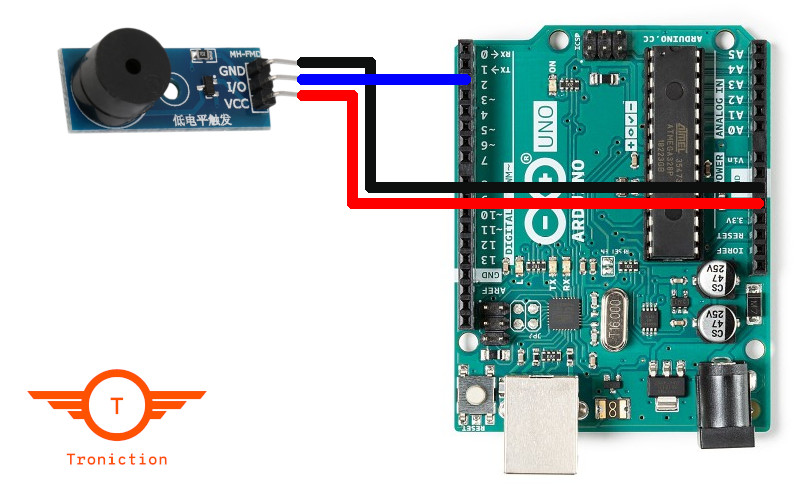
- Connect Buzzer to Arduino
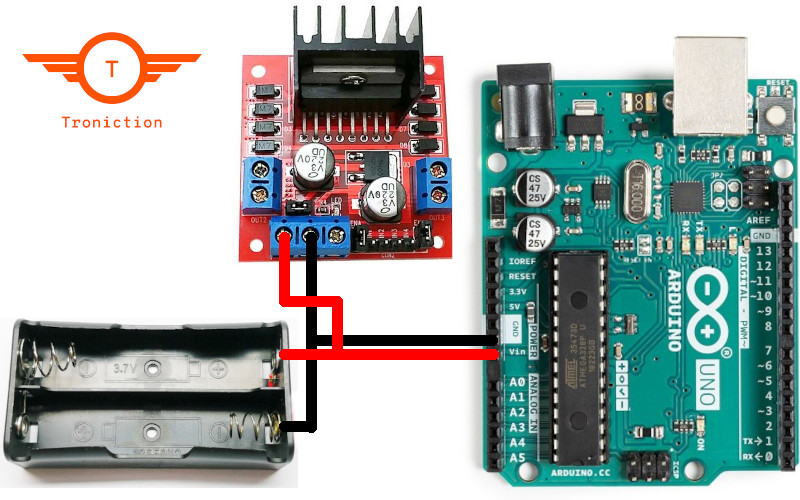
- Connect Battery Pack to Arduino
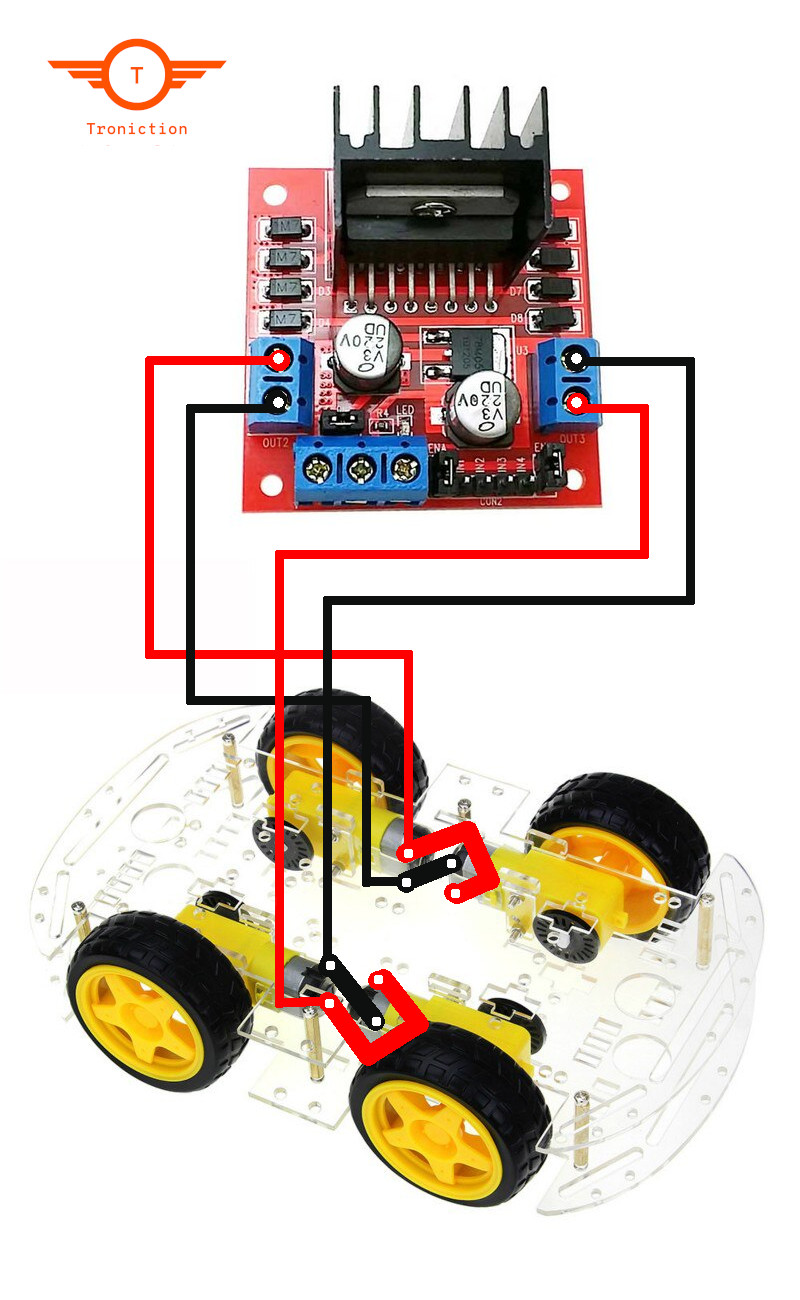
Connect Motor Driver L298N to Gear Motors of the Chasis
Tip: When the gear motor position changes direction perpendicularly, wires should also be interchanged to get the same rotating direction.
See the below diagram, same side wires are not parallel. The wires are interchanged. See the front two motor wirings, the wires are interchanged to get the same direction.
Warning: If you connect the wires parallelly and symmetrically then the wheels will rotate in opposite directions. You may have to change the wiring later.
Always connect the wires as shown in the diagram below. (Change the polarities of the wires when the gear motor rotates 90 degrees).
Connect Motor Driver L298N to Arduino
Connecting the motor driver L298N to Arduino is pretty straightforward. Just use a size 6 ribbon cable and connect the two as shown in the below table.
| Arduino Pin | L298N Pin |
|---|---|
8 |
EnB |
9 |
IN4 |
10 |
IN3 |
11 |
IN2 |
12 |
IN1 |
13 |
EnA |
Connect Bluetooth Module HC-06 to Arduino
Connect Buzzer to Arduino
Connect Battery Pack to Arduino